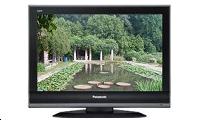
Remote Control
(Our category: TV / Projector Remote)
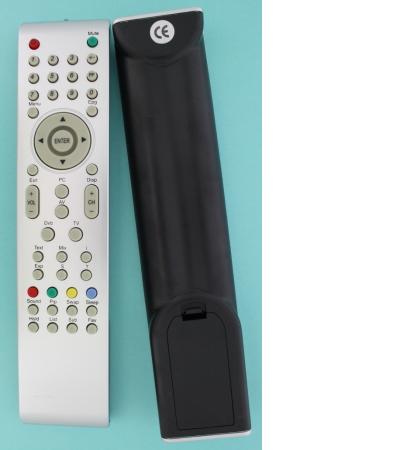
Replacement Remote Control. No setup is required. All you need to do is to insert two batteries and it is ready to use. Long battery life; remote goes into very low power sleep mode when not in use.
This remote works on the Panasonic TX-26LMD70 only.
You will be able to access the important setup menus and also;We do have a Panasonic page where you can view all 3m remote controls for Freeview, Dtv, Freesat, Television and DVD. Guaranteed same business day postage right up to 5pm. See our feedback on ebay in corner below. 1st class post - small packet that will fit through your letterbox.
Panasonic TX-26LMD70
Notes on the functions:
8,channel/select eight
9,channel/select nine
0,zero number entry for channels 10 20 30 ..
menu, use to set item up - install channels and change picture settings etc
7,channel/select seven
Operating Instructions LCD Television Model No. TX-26LMD70 TX-32LMD70 INPUT GUIDE EXIT OKMENU RETURN ASPECT OPTION DIRECT TV REC 1 4 7 2 5 8 0 VCR 3 6 9 TEXT STTL INDEX HOLD REC PROGRAMME VCR DVD TVU.K. Standard English Please read these instructions before operating your set and retain them for future reference. The images shown in this manual are for illustrative purposes only. Turn your living room into a home theatre! Experience an amazing level of multi-media excitement Receive digital terrestrial broadcastings using an integrated (Digital Video Broadcasting) tun er(Display DVB programmes with TV Guide (p. 14) / Timer recording (p. 36) / Register and instant ly call up favourite programmes with Profile Edit (p. 29)) Sharp pictures with HDMI terminal Control DVD recorder / VCR via TV with Q-Link connection (p. 38) Create home theatre and Panasonic equipment link-ups with "VIERA Link" without complicate d settings! (p. 40) Support Audio Description signal (p. 13 and p. 22) Audio description (AD) is an ancillary component associated with a broadcasting which delivers a verbal description o f the visual scene as an aid to understanding and enjoyment particularly, for visually-impaire d viewers. Trade Mark of the DVB Digital Video Broadcasting Project (1991 to 1996) TX-26LMD70 Declaration of Conformity No 4419, 11 December 2006 TX-32LMD70 Declaration of Conformity No 4421, 11 Dece mber 2006 2Contents Be Sure to Read Enjoy rich multi-media · · · Safety Precautions ······································ 4 (Warning & Caution) Notes ········ ··················································· 5 Maintenance····························· ··················· 5 Quick Start Guide Camcorder Quick Start Guide Accessories / Options ········· 6 Identifying Controls ·············· 7 Basi c Connection ·················· 8 Auto Setup······························ 10 Enjoy your TV! Basic Features Personal computer Viewing Amplifier with Speaker system DVD Recorder Satellite receiver VCR DVD player · · · · · · · · · · · · · · · · · · · · · · Watching TV ·············································· 12 Using TV Guide ················· ························ 14 Watching VCR, DVD and Satellites ·········· 16 Viewing Teletext ·· ······································ 18 Advanced Features How to Use Menu Functions ····················· 21 (picture, sound quality, etc.) DVB Settings (DVB) ·································· 26 (pay-TV, software update) Editing Channels ······ ································· 28 Tuning Channels ······································· 3 0 Restore Settings········································ 32 Owner ID ······················· ···························· 33 Input Labels··············································· 34 Displaying PC Screen on TV····················· 35 Recording Controls (DVB)·················· ······· 36 Q-Link Functions ······································· 38 HDMI Functions ········ ······························· 39 (HDMI terminal / VIERA Link) External Equipment ··········· ························ 42 Advanced FAQs, etc. Technical Information ································ 44 FAQs ······························· ·························· 47 On screen messages ································ 49 Specifica tions ············································ 51 Index ·································· ······················· 51 Licence ······················································ 52 FAQs, etc. 3Safety Precautions Warning & Caution Handling the mains plug Ensure that the mains plug is easily accessible at all times. The On / Off switch on this mode l does not fully disconnect the TV from the mains supply. This TV will still consume some powe r even in the Standby mode, as long as the mains plug is still connected to a live socket outl et. Remove the mains plug from the wall socket when the TV is not used for a prolonged period of time. Power source This TV is designed to operate on 220-240V, 50 Hz AC. Do not remove the cover Do not remove the rear cover as live parts are accessible when it is removed. There are no use r serviceable parts inside. Do not expose to direct sunlight and other sources of heat Avoid exposing the TV to direct sunlight and other sources of heat. To prevent fire never plac e any type of candle or naked flame on top or near the TV. AC 220-240 V 50 Hz Transport only in upright position Transporting the TV with its display panel facing upright or downward may cause damage to the internal circuitry. IMPORTANT: THE MOULDED MAINS PLUG FOR YOUR SAFETY, PLEASE READ THE FOLLOWING TEXT CAREFULLY. This appliance is supplied with a m oulded three pin mains plug for your safety and convenience. A 5 amp fuse is fitted in this ma ins plug. Shall the fuse need to be replaced, please ensure that the replacement fuse has a ra ting of 5 amps and that it is approved by ASTA or BSI to BS1362. Check for the ASTA mark ASA o r the BSI mark on the body of the fuse. If the mains plug contains a removable fuse cover, you must ensure that it is refitted when the fuse is replaced. If you lose the fuse cover the mai ns plug must not be used until a replacement cover is obtained. A replacement fuse cover may b e purchased from your local Panasonic Dealer. If the fitted moulded mains plug is unsuitable f or the socket outlet in your home, then the fuse shall be removed and the mains plug cut off a nd disposed of safety. There is a danger of severe electrical shock if the cut off mains plug is inserted into any 13 amp socket. If a new mains plug is to be fitted, please observe the wi ring code as shown below. If in any doubt, please consult a qualified electrician. IMPORTANT: The wires in this mains lead are coloured in accordance with the following code: Blue: Neu tral Brown: Live As the colours of the wire in the mains lead of this appliance may not corres pond with the coloured Example 1 markings identifying the terminals in your mains plug, procee d as follows. The wire which is coloured BLUE must be connected to the terminal in the mains p lug which is marked with the letter N or coloured BLACK. The wire which is coloured BROWN must be connected to the terminal in the mains plug which is marked with the letter L or coloured RED. Under no circumstances should either of these wires be connected to the Earth terminal of the three pin mains plug, marked with the letter E or the earth symbol . How to replace the f use. Example 2 For plug type shown in example 1: Lift out the removable fuse compartment with a screwdriver and replace the fuse, then refit securely into the mains plug (see example 1). F or plug type shown in example 2: Lift open the fuse compartment, in the mains plug, with a scr ewdriver, and replace the fuse, then press the fuse cover down securely (see example 2). 4Notes Auto power standby function Do not expose to rain or excessive moisture
We have been in business since 1992. We also trade on ebay under the user name GenuineCopies: